


Showing 1–96 of 102 results
-
![[ASIA-CEYLON] Carte Plate qui Comprend L'Isle de Ceylan, et une Partie des Cotes de Malabar et de Coromandel.](https://antiqueprintmaproom.com/wp-content/uploads/2020/08/MG_1167-copy-270x179.jpg "[ASIA-CEYLON] Carte Plate qui Comprend L’Isle de Ceylan, et une Partie des Cotes de Malabar et de Coromandel. South Asia")
1775
[ASIA-CEYLON] Carte Plate qui Comprend L’Isle de Ceylan, et une Partie des Cotes de Malabar et de Coromandel.
$A 875 Add to cart -
![[ASIA-INDONESIA] Carte de la Cote Occidentale de l'Isle Sumatra depuis la ligne Equinoctiale, jusquau Détroit de la Sonde.](https://antiqueprintmaproom.com/wp-content/uploads/2020/08/MG_2792-copy-203x270.jpg "[ASIA-INDONESIA] Carte de la Cote Occidentale de l’Isle Sumatra depuis la ligne Equinoctiale, jusquau Détroit de la Sonde. MAPS & GLOBES")
1775
[ASIA-INDONESIA] Carte de la Cote Occidentale de l’Isle Sumatra depuis la ligne Equinoctiale, jusquau Détroit de la Sonde.
$A 350 Add to cart -
![[ASIA-INDONESIA] Carte de la Cote Occidentale de l'Isle Sumatra depuis la Riviere Sinkel Jusques a la Pointe D'Indrapour.](https://antiqueprintmaproom.com/wp-content/uploads/2020/08/MG_2794-copy-201x270.jpg "[ASIA-INDONESIA] Carte de la Cote Occidentale de l’Isle Sumatra depuis la Riviere Sinkel Jusques a la Pointe D’Indrapour. MAPS & GLOBES")
1775
[ASIA-INDONESIA] Carte de la Cote Occidentale de l’Isle Sumatra depuis la Riviere Sinkel Jusques a la Pointe D’Indrapour.
$A 350 Add to cart -
![[ASIA-CEYLON] Carte Plate qui Comprend L'Isle de Ceylan, et une Partie des Cotes de Malabar et de Coromandel.](https://antiqueprintmaproom.com/wp-content/uploads/2021/03/MG_2784-copy-270x197.jpg "[ASIA-CEYLON] Carte Plate qui Comprend L’Isle de Ceylan, et une Partie des Cotes de Malabar et de Coromandel. South Asia")
1775
[ASIA-CEYLON] Carte Plate qui Comprend L’Isle de Ceylan, et une Partie des Cotes de Malabar et de Coromandel.
$A 650 Add to cart -
![[ASIA-INDIA] Carte Reduite du Golfe de Bengale, depuis L'Isle de Ceylan Justquau Golfe de Siam, avec la Partie Septentroinale du Detroit de Malac.](https://antiqueprintmaproom.com/wp-content/uploads/2020/08/MG_2786-copy-270x201.jpg "[ASIA-INDIA] Carte Reduite du Golfe de Bengale, depuis L’Isle de Ceylan Justquau Golfe de Siam, avec la Partie Septentroinale du Detroit de Malac. South Asia")
1775
[ASIA-INDIA] Carte Reduite du Golfe de Bengale, depuis L’Isle de Ceylan Justquau Golfe de Siam, avec la Partie Septentroinale du Detroit de Malac.
$A 875 Add to cart -
![[ASIA] Carte Reduite de l'Ocean Oriental Septentrional, qui Contient une partie des Cotes d'Afrique, de l'Arabie, de la Perse, et celles de l'Indostan....](https://antiqueprintmaproom.com/wp-content/uploads/2021/03/MG_2782-copy-270x198.jpg "[ASIA] Carte Reduite de l’Ocean Oriental Septentrional, qui Contient une partie des Cotes d’Afrique, de l’Arabie, de la Perse, et celles de l’Indostan…. South Asia")
1775
[ASIA] Carte Reduite de l’Ocean Oriental Septentrional, qui Contient une partie des Cotes d’Afrique, de l’Arabie, de la Perse, et celles de l’Indostan….
$A 450 Add to cart -
![[AFRICA] Plan de L'Isle de Bourbon, Situee sur l'Ocean Oriental.](https://antiqueprintmaproom.com/wp-content/uploads/2021/03/MG_2750-copy-189x270.jpg "[AFRICA] Plan de L’Isle de Bourbon, Situee sur l’Ocean Oriental. Africa Countries")
1775
[AFRICA] Plan de L’Isle de Bourbon, Situee sur l’Ocean Oriental.
$A 550 Add to cart -
![[AFRICA] Plan de L'Isle de France.](https://antiqueprintmaproom.com/wp-content/uploads/2021/05/MG_3339-copy-270x194.jpg "[AFRICA] Plan de L’Isle de France. Africa Countries")
1775
[AFRICA] Plan de L’Isle de France.
$A 2,250 Add to cart -
![[NEW ZEALAND] Bream Head to Tepaki Point (Mecury Bay) including Hauraki Gulf](https://antiqueprintmaproom.com/wp-content/uploads/2022/06/MG_5992-copy-270x180.jpg "[NEW ZEALAND] Bream Head to Tepaki Point (Mecury Bay) including Hauraki Gulf New Zealand")
1806
[NEW ZEALAND] Bream Head to Tepaki Point (Mecury Bay) including Hauraki Gulf
$A 650 Add to cart -
![[AUSTRALIA-NT] Chart of Terra Australis by M. Flinders Comm.r. of H.M.S. Sloop Investigator 1802-3. Corrections by Comr. Stokes 1841.](https://antiqueprintmaproom.com/wp-content/uploads/2023/11/MG_9676web-185x270.jpg "[AUSTRALIA-NT] Chart of Terra Australis by M. Flinders Comm.r. of H.M.S. Sloop Investigator 1802-3. Corrections by Comr. Stokes 1841. Australia")
1814
[AUSTRALIA-NT] Chart of Terra Australis by M. Flinders Comm.r. of H.M.S. Sloop Investigator 1802-3. Corrections by Comr. Stokes 1841.
$A 750 Add to cart -

1824
Chart of the Bay of Fundy, Compiled from Various Manuscript Documents in the Hydrographical Office of the Admiralty. 1824 Sheet 2nd.
$A 1,350 Add to cart -
![[SOUTH AMERICA] South America West Coast Sheet XII Peru Cape Lobos to Pescadores Point by Capt. Robert Fitz Roy R.N. and the Officers of H.M.S. Beagle 1836](https://antiqueprintmaproom.com/wp-content/uploads/2024/12/MG_9378web-270x209.jpg "[SOUTH AMERICA] South America West Coast Sheet XII Peru Cape Lobos to Pescadores Point by Capt. Robert Fitz Roy R.N. and the Officers of H.M.S. Beagle 1836 South America")
1840
[SOUTH AMERICA] South America West Coast Sheet XII Peru Cape Lobos to Pescadores Point by Capt. Robert Fitz Roy R.N. and the Officers of H.M.S. Beagle 1836
$A 1,250 Add to cart -
![[SOUTH AMERICA-ARGENTINA] Staten Island by Lieuten. Rendell 1828](https://antiqueprintmaproom.com/wp-content/uploads/2023/11/MG_8935-Web-270x204.jpg "[SOUTH AMERICA-ARGENTINA] Staten Island by Lieuten. Rendell 1828 South America")
1840
[SOUTH AMERICA-ARGENTINA] Staten Island by Lieuten. Rendell 1828
$A 1,650 Add to cart -
![[SOUTH AMERICA] The South-Eastern Part of Tierra del Fuego with Staten Island, Caper Horn and Diego Ramirez Islands.](https://antiqueprintmaproom.com/wp-content/uploads/2023/11/MG_8767-Web-270x182.jpg "[SOUTH AMERICA] The South-Eastern Part of Tierra del Fuego with Staten Island, Caper Horn and Diego Ramirez Islands. South America")
1841
[SOUTH AMERICA] The South-Eastern Part of Tierra del Fuego with Staten Island, Caper Horn and Diego Ramirez Islands.
$A 650 Add to cart -
![[AUSTRALIA-NSW] Australia East Coast Sheet III Jervis Bay to Broken Bay from a running survey by Capt. J. Lort Stokes H.M.S. Acheron](https://antiqueprintmaproom.com/wp-content/uploads/2025/11/MG_1588web-201x270.jpg "[AUSTRALIA-NSW] Australia East Coast Sheet III Jervis Bay to Broken Bay from a running survey by Capt. J. Lort Stokes H.M.S. Acheron Acquisitions Maps")
1852
[AUSTRALIA-NSW] Australia East Coast Sheet III Jervis Bay to Broken Bay from a running survey by Capt. J. Lort Stokes H.M.S. Acheron
$A 2,450 Add to cart -
![[PACIFIC_SOCIETY ISLANDS] Owaarre Harbour in Huaheine Island by Edwin Rowe Mast, R.N. 1852.](https://antiqueprintmaproom.com/wp-content/uploads/2024/12/MG_9361web-205x270.jpg "[PACIFIC_SOCIETY ISLANDS] Owaarre Harbour in Huaheine Island by Edwin Rowe Mast, R.N. 1852. HYDROGRAPHIC MAPS")
1853
[PACIFIC_SOCIETY ISLANDS] Owaarre Harbour in Huaheine Island by Edwin Rowe Mast, R.N. 1852.
$A 1,250 Add to cart -
![[AUSTRALIA-QLD] North and East Coast Sheet XX Cape Grenville to Booby Id.](https://antiqueprintmaproom.com/wp-content/uploads/2023/11/MG_9682web-270x152.jpg "[AUSTRALIA-QLD] North and East Coast Sheet XX Cape Grenville to Booby Id. Australia")
1855
[AUSTRALIA-QLD] North and East Coast Sheet XX Cape Grenville to Booby Id.
$A 650 Add to cart -

1857
[NEW ZEALAND Foveaux Strait and South Id.
$A 1,450 Add to cart -
![[NEW ZEALAND] Manukau Harbour to Cape Egmont Surveyed by Comr. B. Drury and the Officers of H.M.S. Pandora. ...](https://antiqueprintmaproom.com/wp-content/uploads/2022/10/MG_6567-copy-182x270.jpg "[NEW ZEALAND] Manukau Harbour to Cape Egmont Surveyed by Comr. B. Drury and the Officers of H.M.S. Pandora. … New Zealand")
1857
[NEW ZEALAND] Manukau Harbour to Cape Egmont Surveyed by Comr. B. Drury and the Officers of H.M.S. Pandora. …
$A 2,450 Add to cart -
![[NEW ZEALAND] R. Awarua to Abut Head from a Running Survey by Captn. J.L. Stokes...](https://antiqueprintmaproom.com/wp-content/uploads/2021/03/MG_5912-copy-270x215.jpg "[NEW ZEALAND] R. Awarua to Abut Head from a Running Survey by Captn. J.L. Stokes… New Zealand")
1857
[NEW ZEALAND] R. Awarua to Abut Head from a Running Survey by Captn. J.L. Stokes…
$A 325 Add to cart -
![[NEW ZEALAND] Abut Head to Cape Foulwind](https://antiqueprintmaproom.com/wp-content/uploads/2020/06/mg_8462_copy_1-181x270.jpg "[NEW ZEALAND] Abut Head to Cape Foulwind New Zealand")
1858
[NEW ZEALAND] Abut Head to Cape Foulwind
$A 1,350 Add to cart -
![[NEW ZEALAND] C. Foulwind to D'Urville Id. including Blind & Massacre Bays...](https://antiqueprintmaproom.com/wp-content/uploads/2021/03/MG_2602-copy-270x184.jpg "[NEW ZEALAND] C. Foulwind to D’Urville Id. including Blind & Massacre Bays… New Zealand")
1858
[NEW ZEALAND] C. Foulwind to D’Urville Id. including Blind & Massacre Bays…
$A 850 Add to cart -
![[SOUTH AMERICA-BRAZIL] THE ROCAS by Lieut. A.Vital de Oliveira, Impl. Brazilian Navy.](https://antiqueprintmaproom.com/wp-content/uploads/2020/09/MG_1391-copy-270x179.jpg "[SOUTH AMERICA-BRAZIL] THE ROCAS by Lieut. A.Vital de Oliveira, Impl. Brazilian Navy. Americas")
1858
[SOUTH AMERICA-BRAZIL] THE ROCAS by Lieut. A.Vital de Oliveira, Impl. Brazilian Navy.
$A 275 Add to cart -
![[NEW ZEALAND] Cook Strait Anchorages. Sheet 1. Durville Island](https://antiqueprintmaproom.com/wp-content/uploads/2020/06/mg_8473_copy_2-270x185.jpg "[NEW ZEALAND] Cook Strait Anchorages. Sheet 1. Durville Island New Zealand")
1859
[NEW ZEALAND] Cook Strait Anchorages. Sheet 1. Durville Island
$A 1,750 Add to cart -
![[NEW ZEALAND] Cook Strait Anchorages. Sheet 2. Croisilles Harbour, Pelorus Sound, Port Gore, Queen Charlotte Sound, Tory Channel, & Port Underwood.](https://antiqueprintmaproom.com/wp-content/uploads/2022/05/MG_5904-copy-270x183.jpg "[NEW ZEALAND] Cook Strait Anchorages. Sheet 2. Croisilles Harbour, Pelorus Sound, Port Gore, Queen Charlotte Sound, Tory Channel, & Port Underwood. New Zealand")
1859
[NEW ZEALAND] Cook Strait Anchorages. Sheet 2. Croisilles Harbour, Pelorus Sound, Port Gore, Queen Charlotte Sound, Tory Channel, & Port Underwood.
$A 1,250 Add to cart -
![[ASIA-SINGAPORE] China Sea - Banka Strait to Singapore](https://antiqueprintmaproom.com/wp-content/uploads/2020/06/mg_2647_copy_1-178x270.jpg "[ASIA-SINGAPORE] China Sea – Banka Strait to Singapore WALL MAPS")
1861
[ASIA-SINGAPORE] China Sea – Banka Strait to Singapore
$A 1,750 Add to cart -
![[AUSTRALIA-QLD] Keppel Islands to Percy Isles Excluding Capricorn Channel.](https://antiqueprintmaproom.com/wp-content/uploads/2020/06/keppel-isles-270x121.jpg "[AUSTRALIA-QLD] Keppel Islands to Percy Isles Excluding Capricorn Channel. Queensland")
1863
[AUSTRALIA-QLD] Keppel Islands to Percy Isles Excluding Capricorn Channel.
$A 650 Add to cart -
![[PACIFIC-NEW CALEDONIA] Kunie or Isle of Pines to Wen Island.](https://antiqueprintmaproom.com/wp-content/uploads/2020/06/img_4813_copy_1-183x270.jpg "[PACIFIC-NEW CALEDONIA] Kunie or Isle of Pines to Wen Island. HYDROGRAPHIC MAPS")
1863
[PACIFIC-NEW CALEDONIA] Kunie or Isle of Pines to Wen Island.
$A 475 Add to cart -
![[AFRICA-EGYPT] Mersa Matruh to Alexandria](https://antiqueprintmaproom.com/wp-content/uploads/2024/05/MG_9698web-270x152.jpg "[AFRICA-EGYPT] Mersa Matruh to Alexandria Africa")
1864
[AFRICA-EGYPT] Mersa Matruh to Alexandria
$A 450 Add to cart -
![[AFRICA-EYGPT] Derna to Mersa MAtruh](https://antiqueprintmaproom.com/wp-content/uploads/2024/05/MG_9704web-270x184.jpg "[AFRICA-EYGPT] Derna to Mersa MAtruh Africa")
1864
[AFRICA-EYGPT] Derna to Mersa MAtruh
$A 300 Add to cart -
![[AUSTRALIA-SA] Wood Point to Lowly Point Including the Approach to Port Augusta.......](https://antiqueprintmaproom.com/wp-content/uploads/2022/04/MG_5641-copy-270x188.jpg "[AUSTRALIA-SA] Wood Point to Lowly Point Including the Approach to Port Augusta……. South Australia")
1865
[AUSTRALIA-SA] Wood Point to Lowly Point Including the Approach to Port Augusta…….
$A 650 Add to cart -
![[AUSTRALIA-NSW] Tacking Point to Coffs](https://antiqueprintmaproom.com/wp-content/uploads/2023/06/MG_7865-184x270.jpg "[AUSTRALIA-NSW] Tacking Point to Coffs Australia")
1865
[AUSTRALIA-NSW] Tacking Point to Coffs
$A 2,850 Add to cart -
![[AFRICA-LIBYA] Benghazi to Derna....](https://antiqueprintmaproom.com/wp-content/uploads/2024/05/MG_9686web-184x270.jpg "[AFRICA-LIBYA] Benghazi to Derna…. Africa")
1865
[AFRICA-LIBYA] Benghazi to Derna….
$A 225 Add to cart -

1866
Maldive Islands
$A 325 Add to cart -
![[PACIFIC-NEW CALEDONIA] New Caledonia New Hebrides & Loyalty Islands.](https://antiqueprintmaproom.com/wp-content/uploads/2020/06/img_4819_copy_1-184x270.jpg "[PACIFIC-NEW CALEDONIA] New Caledonia New Hebrides & Loyalty Islands. HYDROGRAPHIC MAPS")
1866
[PACIFIC-NEW CALEDONIA] New Caledonia New Hebrides & Loyalty Islands.
$A 450 Add to cart -
![[EUROPE-ITALY] Gulf of Naples Surveyed by M.Darondeau & Gaussin: Imp. French Navy. 1857....](https://antiqueprintmaproom.com/wp-content/uploads/2024/05/MG_9692web-270x189.jpg "[EUROPE-ITALY] Gulf of Naples Surveyed by M.Darondeau & Gaussin: Imp. French Navy. 1857…. Italy")
1867
[EUROPE-ITALY] Gulf of Naples Surveyed by M.Darondeau & Gaussin: Imp. French Navy. 1857….
$A 350 Add to cart -

1869
Cochin China Saigon River to Phan-Rang Bay
$A 950 Add to cart -
![[AUSTRALIA-SA] Anchorages in St. Vincent Gulf.](https://antiqueprintmaproom.com/wp-content/uploads/2020/06/MG_3342-copy-270x213.jpg "[AUSTRALIA-SA] Anchorages in St. Vincent Gulf. South Australia")
1869
[AUSTRALIA-SA] Anchorages in St. Vincent Gulf.
$A 675 Add to cart -
![[AUSTRALIA-NSW] Montagu Island to Beecroft Head Surveyed by Captn. F.W.Sidney & Navg.Lieut.J.T.Gowlland R.N. assisted by J.G.Boulton and W.N.Goalen, Navg. Sub Lieut.s and C.George, Navg. Midn. R.N.1868.](https://antiqueprintmaproom.com/wp-content/uploads/2022/05/MG_5901-copy-175x270.jpg "[AUSTRALIA-NSW] Montagu Island to Beecroft Head Surveyed by Captn. F.W.Sidney & Navg.Lieut.J.T.Gowlland R.N. assisted by J.G.Boulton and W.N.Goalen, Navg. Sub Lieut.s and C.George, Navg. Midn. R.N.1868. New South Wales")
1870
[AUSTRALIA-NSW] Montagu Island to Beecroft Head Surveyed by Captn. F.W.Sidney & Navg.Lieut.J.T.Gowlland R.N. assisted by J.G.Boulton and W.N.Goalen, Navg. Sub Lieut.s and C.George, Navg. Midn. R.N.1868.
$A 850 Add to cart -
![[SOUTH AMERICA-MAGELLAN STRAITS] Magellan Strait to Gulf of Penas](https://antiqueprintmaproom.com/wp-content/uploads/2023/11/MG_8765-Web-179x270.jpg "[SOUTH AMERICA-MAGELLAN STRAITS] Magellan Strait to Gulf of Penas South America")
1871
[SOUTH AMERICA-MAGELLAN STRAITS] Magellan Strait to Gulf of Penas
$A 650 Add to cart -
![[AUSTRALIA-SA] Guichen Bay to Glenelg River ......](https://antiqueprintmaproom.com/wp-content/uploads/2021/08/MG_3682-copy-270x204.jpg "[AUSTRALIA-SA] Guichen Bay to Glenelg River …… South Australia")
1872
[AUSTRALIA-SA] Guichen Bay to Glenelg River ……
$A 1,250 Add to cart -
![[AUSTRALIA-SA] Cape Jervis to Guichen Bay Surveyed by Navg. Lieut. F. Howard, R.N. Assisted by Navg. Sub Lieut.t. W.N. Goalen, R.N. 1870-1.](https://antiqueprintmaproom.com/wp-content/uploads/2021/06/MG_4708-copy-258x270.jpg "[AUSTRALIA-SA] Cape Jervis to Guichen Bay Surveyed by Navg. Lieut. F. Howard, R.N. Assisted by Navg. Sub Lieut.t. W.N. Goalen, R.N. 1870-1. South Australia")
1872
[AUSTRALIA-SA] Cape Jervis to Guichen Bay Surveyed by Navg. Lieut. F. Howard, R.N. Assisted by Navg. Sub Lieut.t. W.N. Goalen, R.N. 1870-1.
$A 950 Add to cart -
![[EUROPE-ITALY] Catania to Cefalu including the Strait of Messina](https://antiqueprintmaproom.com/wp-content/uploads/2024/05/MG_8903web-270x186.jpg "[EUROPE-ITALY] Catania to Cefalu including the Strait of Messina Italy")
1872
[EUROPE-ITALY] Catania to Cefalu including the Strait of Messina
$A 650 Add to cart -
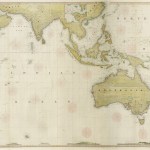
![[AUSTRALIA-] A General Chart of the Indian and Part of the Pacific Oceans, Shewing the Various Passages to & from China, Australia, New Zealand, &c. Carefully Constructed & Compiled from the most approved Observations and Modern Surveys, by J.S. Hobbs, F.R.G.S. Hydrog](https://antiqueprintmaproom.com/wp-content/uploads/2020/06/untitled-1_pano-270x150.jpg "[AUSTRALIA-] A General Chart of the Indian and Part of the Pacific Oceans, Shewing the Various Passages to & from China, Australia, New Zealand, &c. Carefully Constructed & Compiled from the most approved Observations and Modern Surveys, by J.S. Hobbs, F.R.G.S. Hydrog East Asia")
1873
[AUSTRALIA-] A General Chart of the Indian and Part of the Pacific Oceans, Shewing the Various Passages to & from China, Australia, New Zealand, &c. Carefully Constructed & Compiled from the most approved Observations and Modern Surveys, by J.S. Hobbs, F.R.G.S. Hydrog
$A 7,950 Add to cart -
![[AUSTRALIA-SA] Port Lincoln Surveyed by Staff Commander F. Howard, R.N.](https://antiqueprintmaproom.com/wp-content/uploads/2022/04/MG_5639-copy-270x216.jpg "[AUSTRALIA-SA] Port Lincoln Surveyed by Staff Commander F. Howard, R.N. South Australia")
1874
[AUSTRALIA-SA] Port Lincoln Surveyed by Staff Commander F. Howard, R.N.
$A 525 Add to cart -
![[AUSTRALIA-SA] St.Vincent and Spencer Gulf Surveyed by Commr. Hutchison, R.N. and Staff Commr. F.Howard, R.N., 1863-73.](https://antiqueprintmaproom.com/wp-content/uploads/2020/06/MG_3354-copy-a-164x270.jpg "[AUSTRALIA-SA] St.Vincent and Spencer Gulf Surveyed by Commr. Hutchison, R.N. and Staff Commr. F.Howard, R.N., 1863-73. South Australia")
1874
[AUSTRALIA-SA] St.Vincent and Spencer Gulf Surveyed by Commr. Hutchison, R.N. and Staff Commr. F.Howard, R.N., 1863-73.
$A 2,750 Add to cart -
![[AUSTRALIA-SA] C. Catastrophe to Nuyts Archipelago Surveyed by Staff Commr. F. Howard R.N.](https://antiqueprintmaproom.com/wp-content/uploads/2021/06/MG_3891-copy-180x270.jpg "[AUSTRALIA-SA] C. Catastrophe to Nuyts Archipelago Surveyed by Staff Commr. F. Howard R.N. South Australia")
1875
[AUSTRALIA-SA] C. Catastrophe to Nuyts Archipelago Surveyed by Staff Commr. F. Howard R.N.
$A 1,750 Add to cart -
![[AUSTRALIA-WA] Champion Bay](https://antiqueprintmaproom.com/wp-content/uploads/2020/06/mg_8015_copy_2-270x206.jpg "[AUSTRALIA-WA] Champion Bay Western Australia")
1876
[AUSTRALIA-WA] Champion Bay
$A 1,250 Add to cart -
![[AUSTRALIA-WA] Rottnest I. to Warnbro Sound showing the approaches to Gage Roads, Swan River & Cockburn Sound Surveyed by Navg. Lieutt. W.E. Archdeacon R.N.](https://antiqueprintmaproom.com/wp-content/uploads/2020/06/MG_0952web-184x270.jpg "[AUSTRALIA-WA] Rottnest I. to Warnbro Sound showing the approaches to Gage Roads, Swan River & Cockburn Sound Surveyed by Navg. Lieutt. W.E. Archdeacon R.N. Western Australia")
1876
[AUSTRALIA-WA] Rottnest I. to Warnbro Sound showing the approaches to Gage Roads, Swan River & Cockburn Sound Surveyed by Navg. Lieutt. W.E. Archdeacon R.N.
$A 1,650 Add to cart -
![[AMERICA NORTH] Approaches to New York ...](https://antiqueprintmaproom.com/wp-content/uploads/2024/12/MG_9402web-179x270.jpg "[AMERICA NORTH] Approaches to New York … United States")
1877
[AMERICA NORTH] Approaches to New York …
$A 2,450 Add to cart -
![[AUSTRALIA-WA] Cape Naturaliste to King George Sound and Doubtful Island Bay Surveyed by Staff Commander W.E. Archdeacon, R.N. assisted by Navigating Lieutenant William Tooker, R.N. 1876-80. Geographe Bay.](https://antiqueprintmaproom.com/wp-content/uploads/2021/02/MG_2560-copy-270x181.jpg "[AUSTRALIA-WA] Cape Naturaliste to King George Sound and Doubtful Island Bay Surveyed by Staff Commander W.E. Archdeacon, R.N. assisted by Navigating Lieutenant William Tooker, R.N. 1876-80. Geographe Bay. Western Australia")
1878
[AUSTRALIA-WA] Cape Naturaliste to King George Sound and Doubtful Island Bay Surveyed by Staff Commander W.E. Archdeacon, R.N. assisted by Navigating Lieutenant William Tooker, R.N. 1876-80. Geographe Bay.
$A 2,250 Add to cart -
![[EUROPE-SPAIN] Gibraltar to Alicante (Europe) Cape Spartel to Cape Ferrat (Africa) from Spanish and French Charts to 1877.](https://antiqueprintmaproom.com/wp-content/uploads/2024/05/MG_9694web-270x187.jpg "[EUROPE-SPAIN] Gibraltar to Alicante (Europe) Cape Spartel to Cape Ferrat (Africa) from Spanish and French Charts to 1877. Europe")
1878
[EUROPE-SPAIN] Gibraltar to Alicante (Europe) Cape Spartel to Cape Ferrat (Africa) from Spanish and French Charts to 1877.
$A 300 Add to cart -
![[AUSTRALIA-WA] Cape Naturaliste to King George Sound and Doubtful Island Bay Surveyed by Staff Commander W.E. Archdeacon, R.N. assisted by Navigating Lieutenant William Tooker, R.N. 1876-80. Geographe Bay.](https://antiqueprintmaproom.com/wp-content/uploads/2023/06/MG_7350-copy-78XXXX-270x180.jpg "[AUSTRALIA-WA] Cape Naturaliste to King George Sound and Doubtful Island Bay Surveyed by Staff Commander W.E. Archdeacon, R.N. assisted by Navigating Lieutenant William Tooker, R.N. 1876-80. Geographe Bay. Australia")
1878
[AUSTRALIA-WA] Cape Naturaliste to King George Sound and Doubtful Island Bay Surveyed by Staff Commander W.E. Archdeacon, R.N. assisted by Navigating Lieutenant William Tooker, R.N. 1876-80. Geographe Bay.
$A 3,850 Add to cart -
![[AUSTRALIA-WA] North West Coast of Australia Between the Parallels of 10".8' and 21" S. with the off-lying Islands and reefs Compiled chiefly from the surveys of Commander Phillip P. King, R.N. 1818-22.](https://antiqueprintmaproom.com/wp-content/uploads/2021/03/MG_2805-copy-270x186.jpg "[AUSTRALIA-WA] North West Coast of Australia Between the Parallels of 10″.8′ and 21″ S. with the off-lying Islands and reefs Compiled chiefly from the surveys of Commander Phillip P. King, R.N. 1818-22. Northern Territory")
1880
[AUSTRALIA-WA] North West Coast of Australia Between the Parallels of 10″.8′ and 21″ S. with the off-lying Islands and reefs Compiled chiefly from the surveys of Commander Phillip P. King, R.N. 1818-22.
$A 1,150 Add to cart -
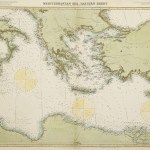
![[MEDITERRANEAN] Eastern Sheet compiled by the most recent surveys 1880](https://antiqueprintmaproom.com/wp-content/uploads/2022/09/MG_6330-COPY-270x180.jpg "[MEDITERRANEAN] Eastern Sheet compiled by the most recent surveys 1880 Africa Countries")
1880
[MEDITERRANEAN] Eastern Sheet compiled by the most recent surveys 1880
$A 850 Add to cart -
![[ASIA-BURMA] Bay of Bengal](https://antiqueprintmaproom.com/wp-content/uploads/2022/04/MG_5643-copy-270x185.jpg "[ASIA-BURMA] Bay of Bengal South Asia")
1880
[ASIA-BURMA] Bay of Bengal
$A 650 Add to cart -
![[AUSTRALIA-SA] Gulf of St.Vincent Backstairs Passage Surveyed by Captain J. Hutchinson, R.N., assisted by Nav. Lieuts. F.Howard and M.S. Guy, R.N. 1869.](https://antiqueprintmaproom.com/wp-content/uploads/2022/09/MG_6453-copy-204x270.jpg "[AUSTRALIA-SA] Gulf of St.Vincent Backstairs Passage Surveyed by Captain J. Hutchinson, R.N., assisted by Nav. Lieuts. F.Howard and M.S. Guy, R.N. 1869. South Australia")
1881
[AUSTRALIA-SA] Gulf of St.Vincent Backstairs Passage Surveyed by Captain J. Hutchinson, R.N., assisted by Nav. Lieuts. F.Howard and M.S. Guy, R.N. 1869.
$A 850 Add to cart -
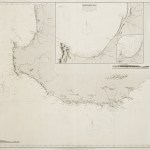
![[AUSTRALIA-WA] South Coast / Doubtful Island Bay to the head of the Great Australian Bight. The coast line made by surveys made by staff Commanders W.E.Archdeacon and F.Howard, Royal Navy.](https://antiqueprintmaproom.com/wp-content/uploads/2020/06/MG_2537-copy-270x181.jpg "[AUSTRALIA-WA] South Coast / Doubtful Island Bay to the head of the Great Australian Bight. The coast line made by surveys made by staff Commanders W.E.Archdeacon and F.Howard, Royal Navy. Western Australia")
1881
[AUSTRALIA-WA] South Coast / Doubtful Island Bay to the head of the Great Australian Bight. The coast line made by surveys made by staff Commanders W.E.Archdeacon and F.Howard, Royal Navy.
$A 550 Add to cart -
![[AUSTRALIA-WA] Bedout Island to Cape Cuvier](https://antiqueprintmaproom.com/wp-content/uploads/2021/03/MG_2541-copy-270x229.jpg "[AUSTRALIA-WA] Bedout Island to Cape Cuvier Western Australia")
1883
[AUSTRALIA-WA] Bedout Island to Cape Cuvier
$A 1,250 Add to cart -
![[AUSTRALIA-WA]Cape Ford to Buccaneer Archipelago](https://antiqueprintmaproom.com/wp-content/uploads/2021/03/MG_2545-copy-270x140.jpg "[AUSTRALIA-WA]Cape Ford to Buccaneer Archipelago Northern Territory")
1883
[AUSTRALIA-WA]Cape Ford to Buccaneer Archipelago
$A 1,150 Add to cart -
![[AUSTRALIA-WA] Buccaneer Archipelago to Redout Island](https://antiqueprintmaproom.com/wp-content/uploads/2021/03/MG_2588-copy-270x181.jpg "[AUSTRALIA-WA] Buccaneer Archipelago to Redout Island Northern Territory")
1883
[AUSTRALIA-WA] Buccaneer Archipelago to Redout Island
$A 2,250 Add to cart -
![[AMERICA NORTH] San Francisco Harbour from the United States Coast Survey 1884 ..](https://antiqueprintmaproom.com/wp-content/uploads/2024/12/MG_9401web-270x182.jpg "[AMERICA NORTH] San Francisco Harbour from the United States Coast Survey 1884 .. North America")
1883
[AMERICA NORTH] San Francisco Harbour from the United States Coast Survey 1884 ..
$A 2,250 Add to cart -
![[SOUTH AMERICA-MAGELLAN STRAIT] English, Crooked, Long and Sea Reaches.](https://antiqueprintmaproom.com/wp-content/uploads/2023/11/MG_8763-Web-270x185.jpg "[SOUTH AMERICA-MAGELLAN STRAIT] English, Crooked, Long and Sea Reaches. South America")
1884
[SOUTH AMERICA-MAGELLAN STRAIT] English, Crooked, Long and Sea Reaches.
$A 750 Add to cart -
![[AUSTRALIA-QLD] Whitsunday Isles to Magnetic Id.](https://antiqueprintmaproom.com/wp-content/uploads/2022/05/MG_5908-copy-1-270x156.jpg "[AUSTRALIA-QLD] Whitsunday Isles to Magnetic Id. Queensland")
1888
[AUSTRALIA-QLD] Whitsunday Isles to Magnetic Id.
$A 750 Add to cart -
![[EUROPE-ITALY] The Faro or Strait of Messina from the Government Chart of 1881.](https://antiqueprintmaproom.com/wp-content/uploads/2024/05/MG_9690web-270x218.jpg "[EUROPE-ITALY] The Faro or Strait of Messina from the Government Chart of 1881. Italy")
1889
[EUROPE-ITALY] The Faro or Strait of Messina from the Government Chart of 1881.
$A 350 Add to cart -
![[EUROPE-GREECE] East Coast Gulf of Volo with Oreos and Talanta Channels.](https://antiqueprintmaproom.com/wp-content/uploads/2020/06/mg_7608_copy-243x270.jpg "[EUROPE-GREECE] East Coast Gulf of Volo with Oreos and Talanta Channels. Balkans & Greece")
1890
[EUROPE-GREECE] East Coast Gulf of Volo with Oreos and Talanta Channels.
$A 250 Add to cart -
![[AFRICA] Suez Canal Port Said from Surveys by Commander L.S. Dawson H.M. Surveying Ship "Sylvia", 1888, and the Compagnie Universelle du Canal Maritime de Suez corrected to 1910.](https://antiqueprintmaproom.com/wp-content/uploads/2023/05/MG_7341-copy-202x270.jpg "[AFRICA] Suez Canal Port Said from Surveys by Commander L.S. Dawson H.M. Surveying Ship “Sylvia”, 1888, and the Compagnie Universelle du Canal Maritime de Suez corrected to 1910. Africa Countries")
1890
[AFRICA] Suez Canal Port Said from Surveys by Commander L.S. Dawson H.M. Surveying Ship “Sylvia”, 1888, and the Compagnie Universelle du Canal Maritime de Suez corrected to 1910.
$A 425 Add to cart -
![[AUSTRALIA-WA] Princess Royal Harbour](https://antiqueprintmaproom.com/wp-content/uploads/2021/03/MG_2587-copy-270x214.jpg "[AUSTRALIA-WA] Princess Royal Harbour TOWN PLANS")
1892
[AUSTRALIA-WA] Princess Royal Harbour
$A 1,850 Add to cart -
![[AUSTRALIA-QLD] Endeavour River Entrance Cook Harbour Surveyed by Commander G. Pirie.](https://antiqueprintmaproom.com/wp-content/uploads/2020/06/mg_2294_copy-270x203.jpg "[AUSTRALIA-QLD] Endeavour River Entrance Cook Harbour Surveyed by Commander G. Pirie. TOWN PLANS")
1893
[AUSTRALIA-QLD] Endeavour River Entrance Cook Harbour Surveyed by Commander G. Pirie.
$A 1,450 Add to cart -
![[AUSTRALIA-WA] Jones Island to Cape Voltaire including the Holothuria Banks](https://antiqueprintmaproom.com/wp-content/uploads/2021/03/MG_2547-copy-185x270.jpg "[AUSTRALIA-WA] Jones Island to Cape Voltaire including the Holothuria Banks Western Australia")
1893
[AUSTRALIA-WA] Jones Island to Cape Voltaire including the Holothuria Banks
$A 750 Add to cart -
![[AFRICA-ALGERIA] Algiers to C. Bougaroni](https://antiqueprintmaproom.com/wp-content/uploads/2024/05/MG_9696web-270x165.jpg "[AFRICA-ALGERIA] Algiers to C. Bougaroni Africa")
1894
[AFRICA-ALGERIA] Algiers to C. Bougaroni
$A 300 Add to cart -
![[ASIA-MALAYSIA] Malacca Strait Pulo Berhala to Cape Rachado](https://antiqueprintmaproom.com/wp-content/uploads/2023/11/MG_9675web-270x207.jpg "[ASIA-MALAYSIA] Malacca Strait Pulo Berhala to Cape Rachado Asia")
1895
[ASIA-MALAYSIA] Malacca Strait Pulo Berhala to Cape Rachado
$A 1,250 Add to cart -
![[AFRICA] Canary Islands Tenerife](https://antiqueprintmaproom.com/wp-content/uploads/2020/11/MG_1692-copy-270x217.jpg "[AFRICA] Canary Islands Tenerife Africa Countries")
1896
[AFRICA] Canary Islands Tenerife
$A 650 Add to cart -
![[AUSTRALIA-WA] C.Mentelle to White Pt. shewing approaches to Cape Leeuwin and Flinders Bay Surveyed by Staff Commander W.E.Archdeacon,R.N.](https://antiqueprintmaproom.com/wp-content/uploads/2020/06/mg_7593_copy_1_1-270x186.jpg "[AUSTRALIA-WA] C.Mentelle to White Pt. shewing approaches to Cape Leeuwin and Flinders Bay Surveyed by Staff Commander W.E.Archdeacon,R.N. Western Australia")
1896
[AUSTRALIA-WA] C.Mentelle to White Pt. shewing approaches to Cape Leeuwin and Flinders Bay Surveyed by Staff Commander W.E.Archdeacon,R.N.
$A 1,250 Add to cart -
![[AUSTRALIA-WA] Esperance Bay Anchorage](https://antiqueprintmaproom.com/wp-content/uploads/2020/06/mg_8017_copy_1_2-270x205.jpg "[AUSTRALIA-WA] Esperance Bay Anchorage TOWN PLANS")
1897
[AUSTRALIA-WA] Esperance Bay Anchorage
$A 850 Add to cart -
![[AUSTRALIA-WA] Esperance Bay Anchorage / Mary Ann Haven (Hopetoun Harbour)](https://antiqueprintmaproom.com/wp-content/uploads/2021/03/MG_2513-copy-270x201.jpg "[AUSTRALIA-WA] Esperance Bay Anchorage / Mary Ann Haven (Hopetoun Harbour) Western Australia")
1897
[AUSTRALIA-WA] Esperance Bay Anchorage / Mary Ann Haven (Hopetoun Harbour)
$A 850 Add to cart -
![[AUSTRALIA-WA] Esperance Bay and Approaches Surveyed by Commander J.W. Combe. Assisted by Lieutenants F.C.C. Pasco, G.E. Corbett, W.T.P. Wilson & Sub-Lieut, B.O.M. Davy.](https://antiqueprintmaproom.com/wp-content/uploads/2021/03/MG_2548-copy-270x181.jpg "[AUSTRALIA-WA] Esperance Bay and Approaches Surveyed by Commander J.W. Combe. Assisted by Lieutenants F.C.C. Pasco, G.E. Corbett, W.T.P. Wilson & Sub-Lieut, B.O.M. Davy. Western Australia")
1897
[AUSTRALIA-WA] Esperance Bay and Approaches Surveyed by Commander J.W. Combe. Assisted by Lieutenants F.C.C. Pasco, G.E. Corbett, W.T.P. Wilson & Sub-Lieut, B.O.M. Davy.
$A 850 Add to cart -
![[AFRICA] Cape Ghir to Garnet Head including the Canary Islands from Admiralty Surveys between the years 1820 & 1838. With additions and corrections to 1897.](https://antiqueprintmaproom.com/wp-content/uploads/2020/06/mg_7603_copy_1-270x184.jpg "[AFRICA] Cape Ghir to Garnet Head including the Canary Islands from Admiralty Surveys between the years 1820 & 1838. With additions and corrections to 1897. Africa Countries")
1898
[AFRICA] Cape Ghir to Garnet Head including the Canary Islands from Admiralty Surveys between the years 1820 & 1838. With additions and corrections to 1897.
$A 275 Add to cart -
![[AUSTRALIA-WA] Plans on the south West Coast of Australia / Koombanah Bay / Hamelin Bay / Hamelin Inner Harbour](https://antiqueprintmaproom.com/wp-content/uploads/2021/03/MG_2511-copy-1-201x270.jpg "[AUSTRALIA-WA] Plans on the south West Coast of Australia / Koombanah Bay / Hamelin Bay / Hamelin Inner Harbour Western Australia")
1898
[AUSTRALIA-WA] Plans on the south West Coast of Australia / Koombanah Bay / Hamelin Bay / Hamelin Inner Harbour
$A 550 Add to cart -
![[ASIA-MALAYSIA] Malacca Strait with Part of the East Coast of the Malay Peninsula](https://antiqueprintmaproom.com/wp-content/uploads/2020/07/MG_0821-copy-270x184.jpg "[ASIA-MALAYSIA] Malacca Strait with Part of the East Coast of the Malay Peninsula ANZAAB Melbourne Rare Book Fair List")
1898
[ASIA-MALAYSIA] Malacca Strait with Part of the East Coast of the Malay Peninsula
$A 2,250 Add to cart -
![[PACIFIC-NEW GUINEA] Plans of Anchorage on the North Coast of New Guinea.](https://antiqueprintmaproom.com/wp-content/uploads/2020/06/img_4779_copy-202x270.jpg "[PACIFIC-NEW GUINEA] Plans of Anchorage on the North Coast of New Guinea. HYDROGRAPHIC MAPS")
1899
[PACIFIC-NEW GUINEA] Plans of Anchorage on the North Coast of New Guinea.
$A 375 Add to cart -
![[AUSTRALIA-QLD] Double Pt. to Cape Grafton](https://antiqueprintmaproom.com/wp-content/uploads/2022/05/MG_5907-copy-185x270.jpg "[AUSTRALIA-QLD] Double Pt. to Cape Grafton Queensland")
1899
[AUSTRALIA-QLD] Double Pt. to Cape Grafton
$A 850 Add to cart -
![[ASIA-SINGAPORE] Straits of Durian Sugi and Chombol.](https://antiqueprintmaproom.com/wp-content/uploads/2020/06/mg_7612_copy-270x198.jpg "[ASIA-SINGAPORE] Straits of Durian Sugi and Chombol. Indonesia, East Indies")
1900
[ASIA-SINGAPORE] Straits of Durian Sugi and Chombol.
$A 1,350 Add to cart -
![[AUSTRALIA-WA] Mary Anne Passage and Approaches Surveyed by Commander J.W. Combe, R.N.](https://antiqueprintmaproom.com/wp-content/uploads/2021/03/MG_2533-copy-185x270.jpg "[AUSTRALIA-WA] Mary Anne Passage and Approaches Surveyed by Commander J.W. Combe, R.N. Western Australia")
1901
[AUSTRALIA-WA] Mary Anne Passage and Approaches Surveyed by Commander J.W. Combe, R.N.
$A 950 Add to cart -
![[SOUTH AMERICA] Cape dos Bahias to Staten Island](https://antiqueprintmaproom.com/wp-content/uploads/2023/11/MG_8761-Web-176x270.jpg "[SOUTH AMERICA] Cape dos Bahias to Staten Island South America")
1901
[SOUTH AMERICA] Cape dos Bahias to Staten Island
$A 650 Add to cart -
![[AUSTRALIA-VIC] Port Phillip to Gabo Island Compiled from the Latest Admiralty Surveys](https://antiqueprintmaproom.com/wp-content/uploads/2020/06/mg_7587_copy_1-270x184.jpg "[AUSTRALIA-VIC] Port Phillip to Gabo Island Compiled from the Latest Admiralty Surveys New South Wales")
1902
[AUSTRALIA-VIC] Port Phillip to Gabo Island Compiled from the Latest Admiralty Surveys
$A 650 Add to cart -
![[AUSTRALIA-WA] Cape Le Grand to Cape Pasley with part of the Archipelago of the Recherche surveyed by Commander J.W.Combe. R.N.](https://antiqueprintmaproom.com/wp-content/uploads/2020/06/mg_7581_copy_1-270x186.jpg "[AUSTRALIA-WA] Cape Le Grand to Cape Pasley with part of the Archipelago of the Recherche surveyed by Commander J.W.Combe. R.N. Western Australia")
1902
[AUSTRALIA-WA] Cape Le Grand to Cape Pasley with part of the Archipelago of the Recherche surveyed by Commander J.W.Combe. R.N.
$A 750 Add to cart -
![[AUSTRALIA-VIC] Entrance to Port Phillip Including the Banks and Channels](https://antiqueprintmaproom.com/wp-content/uploads/2021/03/MG_3073-copy-270x138.jpg "[AUSTRALIA-VIC] Entrance to Port Phillip Including the Banks and Channels WALL MAPS")
1905
[AUSTRALIA-VIC] Entrance to Port Phillip Including the Banks and Channels
$A 1,250 Add to cart -
![[AUSTRALIA-SA] Nepean Bay Surveyed by Captain J. Hutchinson, R.N. assisted by Nav. Lieutts. F.Howard and M.S.Guy, R.N. 1869.](https://antiqueprintmaproom.com/wp-content/uploads/2020/06/mg_7613_copy-270x198.jpg "[AUSTRALIA-SA] Nepean Bay Surveyed by Captain J. Hutchinson, R.N. assisted by Nav. Lieutts. F.Howard and M.S.Guy, R.N. 1869. South Australia")
1907
[AUSTRALIA-SA] Nepean Bay Surveyed by Captain J. Hutchinson, R.N. assisted by Nav. Lieutts. F.Howard and M.S.Guy, R.N. 1869.
$A 650 Add to cart -
![[SOUTH AMERICA-MAGELLAN STRAITS] Ports in Magellan Strait.](https://antiqueprintmaproom.com/wp-content/uploads/2023/11/MG_8771-Web-270x198.jpg "[SOUTH AMERICA-MAGELLAN STRAITS] Ports in Magellan Strait. South America")
1907
[SOUTH AMERICA-MAGELLAN STRAITS] Ports in Magellan Strait.
$A 450 Add to cart -
![[NEW ZEALAND] Maunganui Bluff to Manukau Harbour and Tutukaka Harbour to Mayor Island Including Hauraki Gulf ...](https://antiqueprintmaproom.com/wp-content/uploads/2022/05/MG_5873-copy-270x184.jpg "[NEW ZEALAND] Maunganui Bluff to Manukau Harbour and Tutukaka Harbour to Mayor Island Including Hauraki Gulf … New Zealand")
1908
[NEW ZEALAND] Maunganui Bluff to Manukau Harbour and Tutukaka Harbour to Mayor Island Including Hauraki Gulf …
$A 1,250 Add to cart -
![[AUSTRALIA-WA] North West Coast / Depuch Island Anchorage and Approaches](https://antiqueprintmaproom.com/wp-content/uploads/2021/03/MG_2770-copy-270x200.jpg "[AUSTRALIA-WA] North West Coast / Depuch Island Anchorage and Approaches Western Australia")
1909
[AUSTRALIA-WA] North West Coast / Depuch Island Anchorage and Approaches
$A 850 Add to cart -
![[ASIA-SINGAPORE] China Sea - Singapore Road](https://antiqueprintmaproom.com/wp-content/uploads/2020/07/MG_0747-copy-179x270.jpg "[ASIA-SINGAPORE] China Sea – Singapore Road WALL MAPS")
1911
[ASIA-SINGAPORE] China Sea – Singapore Road
$A 6,750 Add to cart -
![[AUSTRALIA-SA] St.Vincent and Spencer Gulf Surveyed by Commr. Hutchison, R.N. and Staff Commr. F.Howard, R.N., 1863-73.](https://antiqueprintmaproom.com/wp-content/uploads/2021/06/MG_3350-copy-181x270.jpg "[AUSTRALIA-SA] St.Vincent and Spencer Gulf Surveyed by Commr. Hutchison, R.N. and Staff Commr. F.Howard, R.N., 1863-73. South Australia")
1913
[AUSTRALIA-SA] St.Vincent and Spencer Gulf Surveyed by Commr. Hutchison, R.N. and Staff Commr. F.Howard, R.N., 1863-73.
$A 750 Add to cart -
![[AUSTRALIA-WA] Buccaneer Archipelago](https://antiqueprintmaproom.com/wp-content/uploads/2021/03/MG_2542-copy-1-270x140.jpg "[AUSTRALIA-WA] Buccaneer Archipelago Western Australia")
1914
[AUSTRALIA-WA] Buccaneer Archipelago
$A 1,250 Add to cart -
![[SOUTHERN WATERS] Gnomonic Chart for Facilitating Great Circle Sailing / Indian Ocean and Southern Waters](https://antiqueprintmaproom.com/wp-content/uploads/2023/03/MG_7306-copy-270x121.jpg "[SOUTHERN WATERS] Gnomonic Chart for Facilitating Great Circle Sailing / Indian Ocean and Southern Waters Australia (General)")
1914
[SOUTHERN WATERS] Gnomonic Chart for Facilitating Great Circle Sailing / Indian Ocean and Southern Waters
$A 285 Add to cart
Showing 1–96 of 102 results
