Showing 1–48 of 200 results
-
 Baudin & Freycinet")
1807
Plan Des Iles Jerome. Plan des Iles Berthier. (Terre Napoleon)
$A 225 Add to cart -

1811
Carte d’une partie de la Terre Napoleon No 18
$A 1,150 Add to cart -
 17 Baudin & Freycinet")
1811
Carte d’une partie de la Terre Napoleon, ( a la Nouvelle Hollande.) 17
$A 1,850 Add to cart -

1814
Chart of Terra Australis. Sheet III, South coast
$A 10,500 Add to cart -

1827
Oceanique. Partie de la Nouvelle Hollande. No. 54
$A 750 Add to cart -

1834
Karte von dem Sudostlichen Theile Australia’s ……im Innern von Neu Sud Wales bis sum Jahre 1832
$A 350 Add to cart -

1834
Map of the discoveries in Australia copied from the latest M.S. Surveys in the Colonial Office. By Permission dedicated to the Right Honble Viscount Goderich. H. M Principal Secretary of State for the Colonies and President of the Royal Geographical Society, by his Lordships obliged servant J. Arrowsmith.
$A 3,250 Add to cart -

1839
Part of South Australia from the 132 to 141 degree of East Longitude.
$A 245 Add to cart -

1841
Map Shewing the Special Surveys in South Australia to the Eastward of the Gulf of St. Vincent;….
$A 1,850 Add to cart -

1842
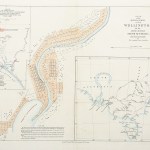
Plan of the Special Survey called Wellington, on the River Murray, South Australia. Pubd. by JI. Arrowsmith, for the Secondary Towns Association.
$A 2,350 Add to cart -

1854
Part of South Australia.
$A 355 Add to cart -
")
1854
South Australia. Sketch of the Country North-east of Spencers Gulf 1854.
$A 475 Add to cart -

1862
Sud-Ostliches Australien.
$A 275 Add to cart -
![[AUSTRALIA-SA] Wood Point to Lowly Point Including the Approach to Port Augusta.......](https://antiqueprintmaproom.com/wp-content/uploads/2022/04/MG_5641-copy-270x188.jpg "[AUSTRALIA-SA] Wood Point to Lowly Point Including the Approach to Port Augusta……. South Australia")
1865
[AUSTRALIA-SA] Wood Point to Lowly Point Including the Approach to Port Augusta…….
$A 650 Add to cart -
 und Die Steinice Wuste (Great Stony Desert) im Innern von Australien. Australia (General)")
1867
Das See’n-Gebiet (Lake District) und Die Steinice Wuste (Great Stony Desert) im Innern von Australien.
$A 650 Add to cart -

1869
South Australia. Rivoli Bay / Shag Point Penguin Island … Surveyed During the Months of June, July, and August 1867 by B. Douglas, Lieut. R.N.R.
$A 950 Add to cart -
![[AUSTRALIA-SA] Anchorages in St. Vincent Gulf.](https://antiqueprintmaproom.com/wp-content/uploads/2020/06/MG_3342-copy-270x213.jpg "[AUSTRALIA-SA] Anchorages in St. Vincent Gulf. South Australia")
1869
[AUSTRALIA-SA] Anchorages in St. Vincent Gulf.
$A 675 Add to cart -
![[AUSTRALIA-SA] Cape Jervis to Guichen Bay Surveyed by Navg. Lieut. F. Howard, R.N. Assisted by Navg. Sub Lieut.t. W.N. Goalen, R.N. 1870-1.](https://antiqueprintmaproom.com/wp-content/uploads/2021/06/MG_4708-copy-258x270.jpg "[AUSTRALIA-SA] Cape Jervis to Guichen Bay Surveyed by Navg. Lieut. F. Howard, R.N. Assisted by Navg. Sub Lieut.t. W.N. Goalen, R.N. 1870-1. South Australia")
1872
[AUSTRALIA-SA] Cape Jervis to Guichen Bay Surveyed by Navg. Lieut. F. Howard, R.N. Assisted by Navg. Sub Lieut.t. W.N. Goalen, R.N. 1870-1.
$A 950 Add to cart -
![[AUSTRALIA-SA] Guichen Bay to Glenelg River ......](https://antiqueprintmaproom.com/wp-content/uploads/2021/08/MG_3682-copy-270x204.jpg "[AUSTRALIA-SA] Guichen Bay to Glenelg River …… South Australia")
1872
[AUSTRALIA-SA] Guichen Bay to Glenelg River ……
$A 1,250 Add to cart -

1873
New South Wales, Victoria, Queensland and South Australia.
$A 375 Add to cart -

1873
Plan of the Try-Again Quartz Claims Nos. 164, 165, 166, 167, 168, 169, Section No. 164, showing the ground pegged out therefor coloured green: 1873.
$A 850 Add to cart -

1874
Proposed New Hundreds Counties Victoria and Daly
$A 525 Add to cart -
![[AUSTRALIA-SA] St.Vincent and Spencer Gulf Surveyed by Commr. Hutchison, R.N. and Staff Commr. F.Howard, R.N., 1863-73.](https://antiqueprintmaproom.com/wp-content/uploads/2020/06/MG_3354-copy-a-164x270.jpg "[AUSTRALIA-SA] St.Vincent and Spencer Gulf Surveyed by Commr. Hutchison, R.N. and Staff Commr. F.Howard, R.N., 1863-73. South Australia")
1874
[AUSTRALIA-SA] St.Vincent and Spencer Gulf Surveyed by Commr. Hutchison, R.N. and Staff Commr. F.Howard, R.N., 1863-73.
$A 2,750 Add to cart -
![[AUSTRALIA-SA] Port Lincoln Surveyed by Staff Commander F. Howard, R.N.](https://antiqueprintmaproom.com/wp-content/uploads/2022/04/MG_5639-copy-270x216.jpg "[AUSTRALIA-SA] Port Lincoln Surveyed by Staff Commander F. Howard, R.N. South Australia")
1874
[AUSTRALIA-SA] Port Lincoln Surveyed by Staff Commander F. Howard, R.N.
$A 525 Add to cart -

1874
Rivoli Bay
$A 750 Add to cart -

1875
South Australia
$A 155 Add to cart -
![[AUSTRALIA-SA] C. Catastrophe to Nuyts Archipelago Surveyed by Staff Commr. F. Howard R.N.](https://antiqueprintmaproom.com/wp-content/uploads/2021/06/MG_3891-copy-180x270.jpg "[AUSTRALIA-SA] C. Catastrophe to Nuyts Archipelago Surveyed by Staff Commr. F. Howard R.N. South Australia")
1875
[AUSTRALIA-SA] C. Catastrophe to Nuyts Archipelago Surveyed by Staff Commr. F. Howard R.N.
$A 1,750 Add to cart -

1876
Plan of the Southern Portion of the Province of South Australia as Divided into Counties and Hundreds Showing Agricultural Areas Post Towns, Telegraph Stations, Main Roads and Railways; Compiled from Official Documents in the office of the Surveyor
$A 750 Add to cart -

1876
Map of the Counties Cardwell, Buckingham and Mac-Donnell
$A 450 Add to cart -

1876
Map of the Counties of Young, Hamley, Albert and Alfred South Australia.
$A 275 Add to cart -

1876
Map of the Counties of Frome & Dalhousie, South Australia.
$A 325 Add to cart -

1876
The Settled Portions of South Australia
$A 110 Add to cart -
![Sheet no. 13 [North / Lake Eyre]](https://antiqueprintmaproom.com/wp-content/uploads/2020/09/MG_1299-copy-270x191.jpg "Sheet no. 13 [North / Lake Eyre] South Australia")
1877
Sheet no. 13 [North / Lake Eyre]
$A 1,750 Add to cart -
![Sheet no. 14 [North / Lake Hope]](https://antiqueprintmaproom.com/wp-content/uploads/2020/09/MG_1298-copy-270x190.jpg "Sheet no. 14 [North / Lake Hope] South Australia")
1877
Sheet no. 14 [North / Lake Hope]
$A 550 Add to cart -
![Sheet no. 15 [North /Lake McKinlay]](https://antiqueprintmaproom.com/wp-content/uploads/2020/09/MG_1297-copy-270x188.jpg "Sheet no. 15 [North /Lake McKinlay] AUSTRALIA")
1877
Sheet no. 15 [North /Lake McKinlay]
$A 550 Add to cart -
![Sheet no. 3 [South East]](https://antiqueprintmaproom.com/wp-content/uploads/2020/09/MG_1309-copy-197x270.jpg "Sheet no. 3 [South East] South Australia")
1877
Sheet no. 3 [South East]
$A 450 Add to cart -
![Sheet no. 16 [North / Simpson Desert]](https://antiqueprintmaproom.com/wp-content/uploads/2020/09/MG_1295-copy-1-270x185.jpg "Sheet no. 16 [North / Simpson Desert] South Australia")
1877
Sheet no. 16 [North / Simpson Desert]
$A 400 Add to cart -
![Sheet no. 4 [Yorke Peninsula & Kangaroo Island]](https://antiqueprintmaproom.com/wp-content/uploads/2020/09/MG_1308-copy-192x270.jpg "Sheet no. 4 [Yorke Peninsula & Kangaroo Island] South Australia")
1877
Sheet no. 4 [Yorke Peninsula & Kangaroo Island]
$A 2,500 Add to cart -
![Sheet no. 5 [Young & Hamely]](https://antiqueprintmaproom.com/wp-content/uploads/2020/09/MG_1307-copy-186x270.jpg "Sheet no. 5 [Young & Hamely] South Australia")
1877
Sheet no. 5 [Young & Hamely]
$A 450 Add to cart -

1877
Key to General Plan Showing Sheets in Position.
$A 450 Add to cart -
![Sheet no. 7 [Mid North / Yunta]](https://antiqueprintmaproom.com/wp-content/uploads/2020/09/MG_1305-copy-270x180.jpg "Sheet no. 7 [Mid North / Yunta] South Australia")
1877
Sheet no. 7 [Mid North / Yunta]
$A 850 Add to cart -
![Sheet no. 9 [North / Beltana]](https://antiqueprintmaproom.com/wp-content/uploads/2020/09/MG_1303-copy-270x189.jpg "Sheet no. 9 [North / Beltana] South Australia")
1877
Sheet no. 9 [North / Beltana]
$A 950 Add to cart -
![Sheet no. 10 [North / Lake Frome]](https://antiqueprintmaproom.com/wp-content/uploads/2020/09/MG_1302-copy-270x190.jpg "Sheet no. 10 [North / Lake Frome] South Australia")
1877
Sheet no. 10 [North / Lake Frome]
$A 750 Add to cart -
![Sheet no. 11 [North / Lake Blanche]](https://antiqueprintmaproom.com/wp-content/uploads/2020/09/MG_1301-copy-270x190.jpg "Sheet no. 11 [North / Lake Blanche] South Australia")
1877
Sheet no. 11 [North / Lake Blanche]
$A 550 Add to cart -
![Sheet no. 12 [North / Finniss Springs]](https://antiqueprintmaproom.com/wp-content/uploads/2020/09/MG_1300-copy-270x193.jpg "Sheet no. 12 [North / Finniss Springs] South Australia")
1877
Sheet no. 12 [North / Finniss Springs]
$A 950 Add to cart -

1878
Map of the City of Adelaide.
$A 550 Add to cart -

1880
1. County of Adelaide. 2. County of Adelaide. Hundred of Noarlunga. 3. Enlargements of Plan City Terminus.
$A 1,650 Add to cart -

1880
Plan of Hundreds of Wirrega & Tatiara.
$A 525 Add to cart
Showing 1–48 of 200 results